Blog
How to Use a Cafetiere
Having trouble brewing a good cup of coffee at home? Many coffee lovers find using a cafetiere challenging. But rest assured – it’s simpler than you might expect.
The cafetiere was first patented in 1929. Since then, it’s been a favoured brewing method. This guide will teach you how to use a cafetiere to brew excellent coffee consistently. You’ll master the technique quickly.
What Is the Step by Step Process for Brewing Coffee in a Cafetiere?
Brewing coffee in a cafetière is simple. You’ll need hot water, ground coffee, and a few minutes to make a tasty cup.
Adding Water
Pour freshly boiled water into your cafetière. Use water that’s just off the boil – let it sit for 60 seconds after boiling. This gives you the right temp for brewing. Fill the cafetière halfway, making sure all the grounds are wet.
Stir gently with a spoon to mix everything well. Then top up with the rest of the water. The amount depends on how many cups you’re making. For each cup, add about 250ml of water.
Stirring and Timing
Stir the coffee grounds after you’ve poured half the hot water. This helps the coffee mix well. Then, add the rest of the water and put the lid on. Set a timer for 4 minutes. This is the best time for the coffee to brew.
It lets the water pull out all the good flavours from the beans. Don’t let it sit too long, or your coffee might taste bitter.
During the 4-minute brew, the coffee steeps to make a rich drink. The grounds float to the top, forming a crust. This is normal. When the timer beeps, your coffee is ready to press.
Don’t rush this step. Good coffee takes time, but not too much time. Stick to 4 minutes for the best taste.
Plunging Technique
Plunge the cafetière slowly after 4 minutes of brewing. Hold the handle with one hand and the plunger with the other. Push down gently and steadily. Don’t rush – fast plunging can let grounds escape into your coffee.
Pour your coffee right away once you’ve plunged. This stops the coffee from getting too strong. If you leave it in the cafetière, it will keep brewing and might taste bitter.

What Is a Cafetiere?
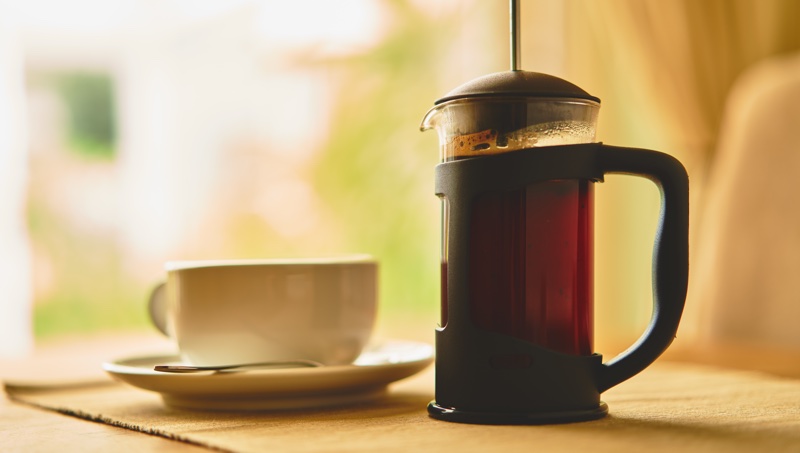
A cafetiere is a simple coffee maker. It’s a glass or metal pot with a plunger and mesh filter.
History and Origins
The cafetière has a fascinating background stretching to 1852. Messers Mayer and Delforge secured the initial patent for its design that year. However, Louis Forest made it functional in 1913.
He introduced the Cafeolette, the first commercially successful cafetière.
Faliero Bondanini refined the design in 1958. His patented version became popular and widely used. This Italian inventor’s efforts contributed to making the cafetière a common household item.
Today, many parts of the world also refer to it as a French press.
Components of A Cafetiere
A cafetière has four main parts. The glass jug holds your coffee and water. A metal or plastic lid sits on top. This lid has a plunger rod attached to it. At the end of the rod is a filter screen.
This screen keeps coffee grounds out of your cup.
You’ll also find a handle on the side of the jug. It helps you pour safely. Some cafetières have a base to protect surfaces from heat. The filter screen is key – it traps grounds but lets flavour through.
Good cafetières use fine mesh for the best results.
Why Choose a Cafetiere for Brewing Coffee?
A cafetiere gives you full control over your brew. You can adjust the strength and taste to suit your liking, making it a top choice for coffee lovers.
Advantages of Using a Cafetiere
Cafetieres offer many perks for coffee lovers. You can brew 6-8 cups at once, perfect for sharing with friends or family. The simple design makes it easy to use and clean. No paper filters or pods needed – just add ground coffee and hot water.
This saves money and reduces waste over time. The tough glass jug doesn’t need preheating, so you can start brewing right away. Plus, its compact size won’t clutter your kitchen counter.
Comparison with Other Brewing Methods
Cafetiere coffee differs from other brewing methods. Here’s how it compares:
| Brewing Method | Taste Profile | Ease of Use | Brew Time |
|---|---|---|---|
| Cafetiere | Full-bodied, bold | Simple | 4-5 minutes |
| Filter | Light, bright | Easy | 3-4 minutes |
| Espresso | Strong, intense | Complex | 30 seconds |
| Pour-over | Clean, crisp | Moderate | 2-3 minutes |
Cafetieres produce coffee with more dissolved solids than filter methods. This results in a richer taste with deeper chocolate and caramel notes. Filter coffee brings out subtle flavours but lacks the full body of cafetiere brews. Espresso offers a quick, intense shot but needs skill and equipment. Pour-over gives a clean cup but requires more attention during brewing. For a bold, simple brew, the cafetiere is an excellent choice.
What Equipment Do You Need to Use a Cafetiere?
You need a few key items to brew great cafetière coffee. A kettle, coffee grinder, and measuring spoon are must-haves for your coffee kit.
Essential Items
To brew perfect cafetière coffee, you need a few key items. Here’s a list of the essentials:
- Cafetière: A heatproof jug with a built-in strainer is central to the setup.
- Kettle: This boils water for your brew. Electric or stovetop works fine.
- Coffee grinder: Freshly ground beans make tastier coffee. A burr grinder produces excellent results.
- Coffee beans: Select whole beans for the freshest taste. Dark roasts work well in a cafetière.
- Measuring spoon: Use this to get the right coffee-to-water ratio. Aim for 1 tablespoon (7g) per 125ml of water.
- Stirring tool: A long spoon helps mix the grounds and water evenly.
- Timer: This helps you avoid over or under-steeping your coffee. Four minutes is often suitable.
- Mug: Pick a size that matches your cafetière for the perfect serve.
Optional Accessories
A cafetière works well on its own, but some extras can improve your coffee experience. Here’s a list of handy items for your brewing:
- Coffee grinder: Grind beans just before brewing for the freshest taste.
- Digital scale: Measure coffee and water precisely for consistent brews.
- Thermometer: Check water temperature to avoid overheating your coffee.
- Timer: Monitor steeping time for ideal strength.
- Milk frother: Add creamy foam to your coffee drinks.
- Travel mug: Enjoy your cafetière coffee whilst out and about.
- Coffee scoop: Measure grounds quickly and easily.
- Stirring spoon: Mix coffee and water for even extraction.
- Coffee storage container: Maintain bean freshness for longer.
- Cleaning brush: Clean your cafetière thoroughly after each use.
How Do You Select the Right Coffee for a Cafetiere?
Picking the right coffee for your cafetière matters. Go for a coarse grind – it’ll give you a rich brew without bits in your cup.
Recommended Coffee Types
For your cafetiere, pick medium to dark roast coffee beans. These give a rich, full-bodied taste. Opt for single-origin beans from Brazil, Colombia, or Ethiopia. They offer unique flavours that shine in a cafetiere brew.
Grind the beans coarsely – about the size of sea salt. This stops small bits from slipping through the mesh filter.
York Emporium sells top-quality beans for cafetieres. Their ethically sourced coffee works well in Bodum or La Cafetiere brands. Try their Colombian blend for a smooth, balanced cup.
Or go for their Ethiopian Yirgacheffe for a fruity, complex flavour. Always use fresh beans for the best taste in your cafetiere.
Grind Size Considerations
Grind size plays a key role in making great cafetière coffee. You need a medium-coarse grind for the best results. If your coffee is too fine, it will lead to over-extraction and a bitter taste.
Too coarse, and you’ll end up with weak, under-extracted coffee.
Many local roasters can grind beans to your exact needs. If you’re grinding at home, aim for a texture like rough sand. This size lets water flow through easily but still extracts plenty of flavour.
Fresh grinding just before brewing gives you the tastiest cup.

What Is the Correct Coffee to Water Ratio for a Cafetiere?
You need the right mix of coffee and water for tasty cafetière coffee. A good rule is 60g of coffee per litre of water. You can change this to suit your taste.
Standard Measurements
For a perfect brew, use the right amount of coffee. A good rule is 7g (1 tablespoon) per 125ml of water. In a 1-litre cafetière, add 50-60g (8 tablespoons) of ground coffee. For a 500ml pot, use 25-30g (4 tablespoons).
A 350ml cafetière needs 20-23g (3 tablespoons). These measures give you a strong, full-bodied cup. Adjust to suit your taste – more for a bolder flavour, less for a milder brew.
Adjusting for Personal Taste
You can adjust your coffee strength to match your preference. Begin with the standard 1:15 ratio of coffee to water. For a more intense flavour, increase the coffee amount – experiment with 1:14 or 1:13.
If you prefer a gentler taste, use less coffee or more water. A 350ml cafetière requires about 21g of grounds, while a 1L one needs 60g. Experiment with these quantities until you achieve your ideal cup.
Keep a record of your attempts to help you remember your preferred combination.
The grind size also influences the taste. Coarser grinds produce a lighter flavour, while finer grinds result in a stronger brew but might pass through the mesh. Modify your grind size along with your ratio.
Try different coffee varieties as well. Light roasts tend to be more acidic, while dark roasts offer a bolder taste. Your ideal brew is waiting to be discovered – enjoy the process of finding it!
How Do You Prepare the Cafetiere Before Brewing?
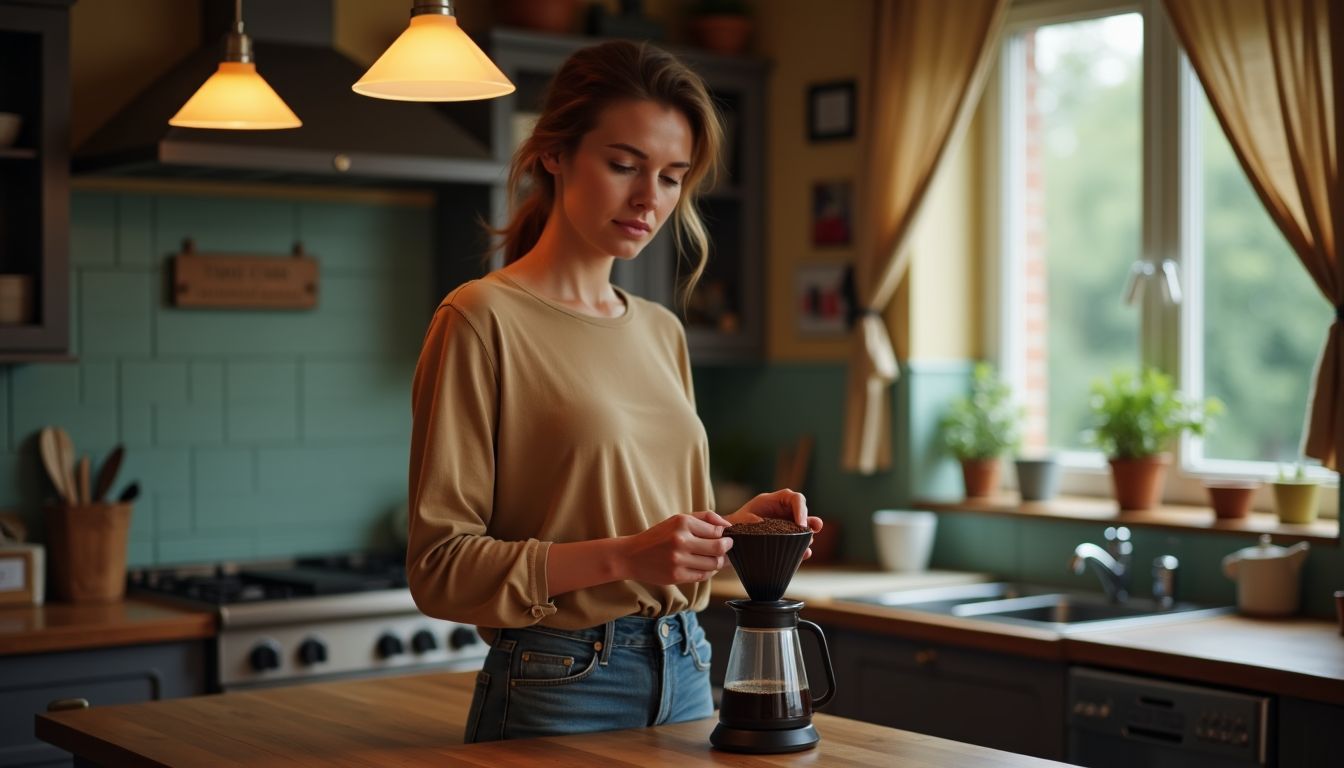
Get your cafetiere ready for a great brew. Warm it up and measure your coffee grounds.
Preheating the Cafetiere
Warming your cafetière before brewing is essential for excellent coffee. Start by boiling fresh water in your kettle. Pour the hot water into the cafetière to heat it. This helps maintain your coffee’s temperature.
Allow the water to sit for 30 seconds. Then, pour out the hot water. Your cafetière is now prepared for brewing. This straightforward technique greatly improves the flavour.
Measuring Coffee Grounds
Measure your coffee grounds with care. Use 15g of coffee for every 250ml of water. For a small cafetiere (350ml), add 21g of ground coffee. A large cafetiere (1L) needs 60g. Digital scales help you get it right every time.
Don’t guess the amount. Too little coffee makes a weak brew. Too much leads to a bitter taste. Stick to these ratios for the best flavour. Adjust slightly if you like your coffee stronger or milder.
How Long Should You Let Coffee Steep in a Cafetiere?
Steeping time is key for great cafetière coffee. Let your brew sit for 4 minutes to get the best taste.
Optimal Steeping Time
Let your coffee steep for 4 minutes in a cafetière. This time works best for most blends. If you’re using 100% Arabica coffee, you can steep it for 5-6 minutes. This extra time brings out a stronger flavour.
Don’t steep espresso blends with Robusta for more than 4 minutes. They can get bitter fast.
Timing is key for tasty cafetière coffee. Set a timer to track your steep time. Start it as soon as you pour hot water over the grounds. When the timer beeps, press the plunger down slowly.
Your perfect cup is ready to pour and enjoy.
Effects of Over or Under Steeping
Over-steeping your coffee leads to a bitter taste. This happens when you leave the grounds in hot water for too long. The ideal brew time is 4 minutes. Any longer, and you’ll extract too many harsh compounds.
Under-steeping, on the other hand, results in weak, flavourless coffee. You’ll miss out on the full range of tasty oils and aromas.
Coarse grounds help prevent over-extraction in a cafetière. They release flavour more slowly than fine grounds. This gives you more control over the brewing process. You can adjust the steeping time to suit your taste without risking bitterness.
Aim for a balance – not too short, not too long – for the perfect cup.
What Are Common Mistakes to Avoid When Using a Cafetiere?
Brewing coffee with a cafetiere may seem challenging initially. Be mindful of these frequent mistakes to consistently prepare excellent coffee.
Grinding Coffee Too Fine
Grinding coffee too fine for a cafetière can spoil your brew. Fine grounds pass through the mesh filter, leaving gritty bits in your cup. They also make it difficult to push down the plunger.
This results in over-extraction, giving you a bitter taste. Use a coarse grind – about the size of sea salt. This allows water to flow freely and gives you a smooth, rich coffee without the bitterness.
You’ll achieve the best results with freshly ground beans. Use a burr grinder for an even, coarse grind. If you buy pre-ground coffee, choose one labelled for ‘French press’ or ‘cafetière’.
These are ground to the appropriate size for your coffee maker. Keep in mind, the correct grind is fundamental to a perfect cup from your cafetière.
Using Water That’s Too Hot
Too hot water can ruin your coffee. Water above 96°C will scald the grounds, making your brew bitter. For the best taste, use water between 92-96°C. This range extracts the good flavours without the bad ones.
Let your kettle cool for 30 seconds after boiling to hit this sweet spot.
You can test the water temp with a thermometer. Or, if you don’t have one, wait about a minute after the kettle boils. This simple step will improve your coffee’s flavour a lot. Your taste buds will thank you for taking care with the water temp.
Pressing the Plunger Too Forcefully
Pressing the plunger too hard can ruin your coffee. It forces tiny coffee bits through the mesh. This makes your drink bitter and gritty. Instead, press gently and slowly. A light touch keeps the grounds at the bottom where they belong.
Your coffee will taste smooth and clean this way.
How Do You Clean and Maintain a Cafetiere?
Clean your cafetiere after each use with warm, soapy water. Rinse it well and dry it to keep it in top shape. Want more tips? Read on!
Daily Cleaning Routine
Clean your cafetière daily to keep it working well. Let it cool after use, then empty the grounds. Rinse with lukewarm water and mild soap. Scrub gently with a soft brush to remove coffee oils.
Dry all parts fully before storing. This quick routine takes just a few minutes but keeps your press in excellent condition. It prevents build-up and helps your next brew taste great.
For a more thorough clean once a week, take apart the plunger and filter. Soak metal parts in warm, soapy water for 15 minutes. Rinse thoroughly and dry. Check the filter mesh for any holes or damage.
Replace if needed to avoid grounds in your cup. Regular care extends your cafetière’s life and improves your coffee experience.
Deep Cleaning Methods
For a thorough clean, dismantle your cafetière. Soak all parts in warm, soapy water for 15 minutes. Use a soft brush to scrub away coffee oils and residue. Rinse each piece well with clean water.
Dry all components fully before reassembling.
You can also use special coffee machine cleaners for deep cleaning. Follow the product instructions carefully. These cleaners often remove stubborn stains and build-up more effectively than regular soap.
Always rinse thoroughly after using any cleaning product on your cafetière.
Can You Make Cold Brew Coffee in a Cafetiere?
Yes, you can make cold brew in a cafetière. It’s easy and tasty. Want to know how? Keep reading!
Cold Brew Process
Cold brew coffee is simple to prepare in a cafetiere. Here’s how you can make it at home:
- Grind coffee beans coarsely. Use 100 grams of coffee for every 1 litre of water.
- Add ground coffee to the cafetiere. Pour in room temperature water slowly.
- Stir gently to mix coffee and water well. Don’t plunge yet.
- Cover the top with cling film or a lid. Allow it to sit for 12-24 hours at room temp.
- After steeping, press the plunger down slowly. This separates the grounds from the liquid.
- Pour the cold brew through a coffee filter to remove any fine bits.
- Serve over ice or mix with water or milk to taste. Store extra in the fridge for up to 2 weeks.
- For a stronger brew, use more coffee or steep longer. For milder taste, use less coffee or steep less.
- Clean your cafetiere thoroughly after each use to maintain fresh flavours.
Differences from Hot Brewing
Cold brew coffee differs from hot brew in key ways. It uses cold water and steeps for 8 to 24 hours. This extended process creates a smoother taste. Hot brew uses hot water and takes just minutes.
The cold method also makes coffee less acidic. This results in a naturally sweeter flavour.
The brewing temperature affects the final taste. Cold brew extracts fewer oils and acids from the beans. This gives it a milder, less bitter taste than hot coffee. You can serve cold brew over ice or heat it up.
It’s a flexible option for coffee lovers who prefer a less acidic drink.
Conclusion
You’ve learned the steps for great cafetière coffee. Use fresh, coarse grounds and hot water. Let it brew for 4 minutes. Press the plunger slowly. Clean your cafetière after each use.
Try different beans to find your perfect cup. Now, go make some tasty coffee!
